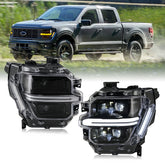
Crystal Clear Vision on the Road - Headlight Cleaning Guide
When it comes to vehicle maintenance, few things are as important yet underestimated as clean headlights. Not only do clean headlights enhance the aesthetics of your car, but they also play a pivotal role in road safety. Think of them as the eyes of your vehicle—clear vision is essential for both you and other drivers on the road. This guide will walk you through the process of cleaning the inside of headlights, offering insights and tips tailored for car enthusiasts, DIYers, and vehicle owners.
Why Do Headlights Get Dirty Inside?
Headlights are highly susceptible to dirt, not just on the outside but also on the inside—a fact often overlooked by many car owners. Various factors contribute to this problem. Firstly, condensation can form inside the headlight casing due to temperature fluctuations, potentially leading to grime buildup. Additionally, old seals can allow moisture and dust to enter, causing further annoyance. Understanding these causes is the first step in preventing and addressing the issue effectively.
Another common reason headlights get dirty inside is due to the natural aging process of materials. Over time, the plastic or glass covering your headlights can become porous, trapping dirt. It's not uncommon for older vehicles to exhibit signs of oxidation, which can lead to a cloudy appearance. Regular maintenance, including proper sealing and cleaning, can mitigate these issues considerably.
Dust particles from driving through different environments, such as rural or construction areas, can also sneak their way inside the headlight assembly. While it may seem a minor issue, such dirt can accumulate over time, affecting the clarity of your headlights. Keeping these factors in mind will help you understand the importance of routine headlight maintenance.

Tools and Materials Needed for Cleaning
Before embarking on this cleaning adventure, it's essential to gather all necessary tools and materials to make the process smooth and efficient. Having the right tools at your disposal can make all the difference between a quick clean-up and a frustrating ordeal.
To begin with, you'll need basic cleaning supplies such as microfiber cloths for wiping down surfaces without scratching them. A gentle cleaning solution, like dish soap mixed with water, is perfect for tackling general dirt. If you encounter stubborn grime, consider using a specialized headlight cleaner or polish to restore clarity.
In addition to cleaners, you'll need tools to open the headlight assembly safely. A screwdriver set will typically suffice, but check your vehicle's manual for any specific requirements. Don't forget to have sealant on hand for resealing your headlights once cleaned. Investing in UV-resistant sealant can help prevent future discoloration and maintain your headlights' longevity.
Step-by-Step Guide for Cleaning Headlights
Preparing the Headlights
Begin by giving your headlights a thorough exterior cleaning. This step is crucial as it helps identify any external scratches or damage that could complicate the internal cleaning process. Use a mild soap solution and a microfiber cloth to wipe away dirt and grime. This initial clean will also make it easier to assess if the interior needs attention.
Once the exterior is clean, take a moment to inspect the headlights for any visible signs of damage. Cracks or chips in the outer lens could allow more moisture and dirt to enter. If you spot any, consider replacing or repairing them before proceeding to ensure optimal cleaning results.
Finally, gather your tools and ensure you have ample workspace and lighting. Proper preparation will make the subsequent steps less stressful and more effective.
Accessing the Inside of the Headlight
After preparing your headlights, it's time to access the insides. Start by removing the headlight casing. Depending on your vehicle model, this may involve unscrewing bolts or clips. Consult your vehicle's manual for guidance to avoid damaging any components during disassembly.
Carefully separate the headlight cover from the assembly, taking note of any wiring or connections. It's crucial to handle these parts with care to avoid any disruption to the electrical setup. Place the casing on a clean, stable surface to work on the insides efficiently.
With the headlight open, assess the level of dirt or moisture inside. This step will determine the cleaning techniques you'll employ. Whether you're dealing with dust or a more stubborn residue, knowing your starting point will guide your cleaning approach.
Cleaning Techniques for Pristine Headlights
To start cleaning, use a microfiber cloth lightly dampened with your cleaning solution. Gently wipe away any visible dirt or moisture, taking care not to press too hard on the internal components. If dealing with hardened grime, allow the solution to sit for a few minutes before wiping it away.
For tougher grime, turn to a specialized headlight cleaner. Apply a small amount on a clean cloth and work in circular motions. This method ensures even cleaning and helps prevent streaks. Remember to check the product instructions for optimal results.
After cleaning, ensure everything is thoroughly dry to prevent moisture from re-entering the assembly. You can use a soft towel or allow the headlights to air dry in a dust-free environment before reassembling. Proper drying is crucial for maintaining the clarity of your headlights.
Tips and Tricks for Headlight Maintenance
Preventive Maintenance to Keep Headlights Shining
Prevention is better than cure, and the same applies to headlight maintenance. One simple preventive measure is parking your vehicle in a garage or shaded area when possible. This reduces exposure to harmful UV rays, which can cause your headlights to yellow over time.
Regularly inspect your headlight seals for any wear or damage. Replace any faulty seals to prevent moisture and dirt from entering. It may seem like a small task, but it can significantly extend the life of your headlights.
Finally, consider using a headlight cover or film. These products provide an additional layer of protection against environmental hazards and can reduce the frequency of cleaning needed. It's a straightforward investment that can save time and effort in the long run.
Using Sealants to Protect Your Headlights
After cleaning, apply a high-quality sealant to your headlights. This step creates a protective barrier against future dirt, moisture, and UV damage. Ensure the sealant you choose is compatible with your headlight material for the best results.
Applying sealant is straightforward. Simply follow the product instructions, ensuring even coverage. Allow it to cure as instructed before exposing your headlights to the elements. This protection will help maintain the clarity and longevity of your headlights.
Regularly reapply sealant as recommended, typically every six months. Doing so ensures continuous protection and keeps your headlights looking new for longer.

Common Mistakes to Avoid During Cleaning
While cleaning headlights may seem simple, there are common pitfalls to avoid. One major mistake is using abrasive materials or harsh chemicals, which can scratch or damage the headlight surface. Always opt for gentle products and tools designed specifically for automotive use.
Another error is neglecting to dry the headlight thoroughly after cleaning. Moisture left inside the assembly can lead to fogging or damage later on. Take the time to ensure everything is dry before reassembling your headlights.
Finally, failing to reseal the headlight properly after cleaning can negate your efforts. Ensure all seals are intact and secure to prevent future dirt or moisture buildup. This attention to detail will yield the best results.
The Bright Path Forward
Maintaining clear and clean headlights is not just about aesthetics—it's a crucial aspect of vehicle safety and performance. By understanding the causes of dirty headlights and following a careful cleaning process, you can improve your driving experience and safety on the road.
Regular maintenance and preventive measures will keep your headlights shining brightly, enhancing both the appearance and value of your vehicle. By investing a little time and effort, you can enjoy the benefits of pristine headlights for years to come.
For those who prefer professional assistance or wish to ensure optimal results, consider scheduling a professional cleaning service. And remember, sharing your experiences with fellow car enthusiasts can inspire others to take up this rewarding maintenance task themselves.


